Hey there! As a supplier of Humanoid Robot Joint Parts, I've seen firsthand the excitement and challenges that come with integrating these parts into a complete robot system. It's a fascinating journey, and I'm here to share some insights on how you can make it a success.
Understanding the Basics
Before we dive into the integration process, let's quickly go over what humanoid robot joint parts are and why they're so important. These parts are the building blocks of a humanoid robot, allowing it to move and interact with its environment in a human - like way. They include things like motors, gears, bearings, and sensors that work together to enable smooth and precise movement.
Step 1: Planning Your Robot System
The first step in integrating humanoid robot joint parts is to have a clear plan for your robot system. You need to define the purpose of your robot. Is it for industrial use, like in a manufacturing plant? Or maybe it's for educational or research purposes? Understanding the end - goal will help you determine the type and number of joint parts you need.
For example, if your robot is going to be used for heavy - duty tasks, you'll need more robust and powerful joint parts. On the other hand, if it's a small, lightweight robot for educational demonstrations, you can go for smaller and less powerful components.
Step 2: Selecting the Right Joint Parts
Once you have a plan, it's time to select the right joint parts. This is where my expertise as a supplier comes in handy. We offer a wide range of high - quality humanoid robot joint parts that are designed to meet different needs.
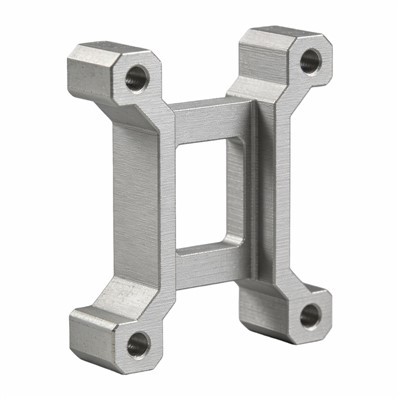
You can check out our Stainless Steel Metal Robot Parts which are known for their durability and strength. These parts are perfect for robots that need to withstand harsh environments or heavy loads.
Another great option is our Robot Accessories. These accessories can enhance the functionality of your robot, such as adding sensors for better perception or grippers for object manipulation.
Step 3: Designing the Assembly
After selecting the parts, you need to design how they will be assembled into a complete robot system. This involves creating a 3D model of your robot using CAD (Computer - Aided Design) software. The model will help you visualize how the joint parts fit together and identify any potential issues before you start building.
When designing the assembly, pay close attention to the kinematics of the robot. Kinematics is the study of motion, and it's crucial for ensuring that your robot can move in the way you want it to. You need to make sure that the joints are arranged in a way that allows for smooth and efficient movement.
Step 4: Building the Robot
Now it's time to start building! This is the most hands - on part of the process. You'll need to follow your assembly design and carefully install each joint part. Make sure to use the right tools and follow the manufacturer's instructions for each part.
During the building process, it's important to test the joints as you go. This will help you identify any problems early on and make adjustments if necessary. For example, if a joint is not moving smoothly, you might need to check the alignment or lubrication.
Step 5: Programming the Robot
Once the robot is built, it's time to program it. Programming is what gives the robot its intelligence and allows it to perform tasks. You can use a variety of programming languages, such as Python or C++, depending on your needs.


The programming process involves defining the movements and actions of the robot. You'll need to write code that controls the motors in the joint parts to make the robot move in a specific way. For example, you can program the robot to walk, pick up objects, or perform a series of pre - defined tasks.
Step 6: Testing and Optimization
After programming, it's important to test the robot thoroughly. This involves running a series of tests to ensure that the robot is functioning correctly. You can test the robot's movement, its ability to interact with objects, and its overall performance.
If you find any issues during testing, you'll need to optimize the robot. This might involve adjusting the programming, making changes to the assembly, or replacing some of the joint parts. Optimization is an ongoing process, and it's important to keep fine - tuning the robot until it meets your requirements.
Step 7: Maintenance and Upgrades
Once your robot is up and running, you'll need to maintain it regularly. This includes checking the joint parts for wear and tear, lubricating the moving parts, and replacing any damaged components.
You might also want to consider upgrading the robot in the future. As technology advances, there will be new and improved joint parts available that can enhance the performance of your robot. For example, you could upgrade to more powerful motors or more accurate sensors.
Why Choose Our Joint Parts?
As a supplier of Humanoid Robot Joint Parts, we take pride in offering high - quality products. Our parts are made from the best materials and are designed to be reliable and long - lasting. We also provide excellent customer support, so if you have any questions or need help with integration, we're here to assist you.
If you're interested in purchasing our humanoid robot joint parts or need more information, don't hesitate to reach out. We're always happy to have a chat and discuss how our products can fit into your robot system. Whether you're a small - scale hobbyist or a large - scale industrial manufacturer, we have the right parts for you.
In conclusion, integrating humanoid robot joint parts into a complete robot system is a complex but rewarding process. By following these steps and using high - quality parts, you can build a robot that meets your specific needs. So, if you're ready to take on the challenge, let's get started!
References
- Robotics: Modelling, Planning and Control by Bruno Siciliano, Lorenzo Sciavicco, Luigi Villani, and Giuseppe Oriolo
- Introduction to Autonomous Mobile Robots by Roland Siegwart, Illah Nourbakhsh, and Davide Scaramuzza